Pasta with Alfredo Sauce

photo 1

Pasta with Alfredo Sauce.  I think it is seriously one of life’s most delicious dishes.

I have a memory of eating an absolutely perfect dish of Fettuccini Alfredo at a very cute, very old authentic Italian restaurant in San Francisco many years ago.  I think it was one of the first weekend trips that Tony and I ever took together.  For the life of me, I can’t remember the name of the restaurant, but it was near Lombard Street.  It was a tiny little place…dark and candlelit inside, with wine racks built in to the walls.  I have a vague recollection of the menu being written entirely in Italian and the waiter translating every dish for us.  Could that be? At any rate, I’ve ordered Fettuccini Alfredo and made Alfredo sauce at home (with just about every kind of pasta) many, many times over the years and I’m always reminded of that lovely little Italian restaurant.

So I’ve convinced you how delicious it is, but did I mention easy too?  Really easy.  Three basic ingredients –  cream, butter and Parmesan cheese.  That’s about it.  Okay, some recipes call for a pinch of nutmeg, some add garlic, some a little lemon zest.  And its a great way to use leftovers – you can toss just about anything into the sauce – cooked chicken, shrimp, ham and all kinds of veggies – asparagus, peas, broccoli, artichoke hearts.  It’s so easy that I’m not sure why they ever even invented those frozen microwaveable versions or (even worse) the kind that comes in a box with a sauce you make from a packet…blech!

My most recent favorite Alfredo sauce recipe is from (you guessed it) the Smitten Kitchen Cookbook.  Just the other night I made it with penne and added some frozen grilled asparagus spears from Trader Joe’s.

Convinced?  I think you should try it.  Really.  You won’t ever use the frozen or boxed stuff again.

 Pasta with Alfredo Sauce

adapted slightly from the Smitten Kitchen Cookbook – makes 2-3 servings

INGREDIENTS

8 ounces your favorite pasta

1 cup heavy cream

4 ounces (half of a stick) unsalted butter

1 tablespoon fresh lemon zest

pinch of nutmeg

salt and freshly ground black pepper

1 cup finely grated Parmesan cheese

1 tablespoon chopped fresh flat-leaf parsley

Optional – 1 cup cooked chicken or shrimp or ham and/or fresh or frozen vegetables, chopped

DIRECTIONS

Bring a large pot of water to the boil.  Add the pasta, and cook according to package instructions. If using fresh vegetables, toss them in with the pasta for the last minute or two too cook.  If using frozen vegetables, they’ll only need 30 seconds or so.  Reserve about 1/2 cup pasta cooking water, and set aside.

Drain the pasta and vegetables (if using) together.

Dry out the pasta pot, and pour in the heavy cream.  Bring the cream to a simmer, and cook until slightly reduced, about 4 minutes, stirring frequently.  Add the butter, and stir until it has melted. Generously season the sauce with freshly ground black pepper; add a pinch of salt, the lemon zest and nutmeg.  Add 3/4 cup of the Parmesan and stir until you have a smooth sauce.  Toss in the drained pasta and vegetables.  If using cooked chicken or ham or whatever, toss that in.  Cook the pasta in sauce for about 2 minutes, until the sauce has slightly thickened.

At this point, SK says to add the reserved pasta water by the spoonful if needed to loosen the sauce…I’ve never actually done this.

Divide the pasta among bowls.  Garnish with remaining Parmesan and chopped parsley.


Caramelized Onion & Chanterelle Mushroom Tart

2013-11-13 003

Last month we were in Portland, OR, visiting our son Kyle and daughter-in-law (still just love saying that!) Calla.  It was blustery and rainy and very fall-like, which was a nice change for us, because when we left San Diego it was like 80 degrees.  Leaves were changing colors and we got to wear sweaters and boots and raincoats (and, believe me, for a San Diegan, this is exciting stuff!)

2013-11-07 08.35.37

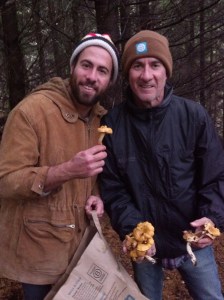
So what does one do in Portland when it’s grey and a little rainy?  Go foraging for chanterelle mushrooms! And now I have to preface this story by saying that every year, around this time, Kyle starts calling us just to brag about the tens of pounds of chanterelle mushrooms they’ve foraged.  I get a little envious. Some culinary experts call chanterelles the “king of mushrooms”.  According to thekitchn.com, “…they sprout from September to February, and grow wild in woodsy areas. They’re difficult to cultivate, but they sprout easily from forest floors….they have a firm flavor and texture and stand up to cooking and heavy sauces very well. The aroma of a chanterelle is sometimes described as being like a fresh apricot. A warning, though. Chanterelles are expensive!”  (Are they ever!  I bought them once.  At that high-end natural foods market.  $24.99 a pound!)

Okay, back to the foraging…Kyle and Calla and their roommate Jesse are quite the mushroomers. They have several “secret” spots around Portland.  Kyle took us to one of them.  We didn’t find a lot, but enough.  And it was really fun.

2013-11-07 12.33.05

Father-son foraging team!

That night, we made dinner at the kids’ place.  We decided that we would use the chanterelles that they already had in the fridge so that Tony and I could bring the ones we foraged back to San Diego with us.  Kyle pulled out his favorite recipe…pappardelle pasta with a chanterelle mushroom and lamb ragout and I made Kale and Brussels Sprouts Salad.  Yu-um!!  What a delicious dinner and a really fun evening that culminated with Kyle, Calla and Jesse’s band Gallop  practicing in the living room and Caramel Salted Dark Chocolate ice cream from nearby Ruby Jewel.  Doesn’t get much better than that!!

1393688_10202708541379667_1346551783_n

Gallop. Calla has a voice like an angel. Really.

When we got home with our little bounty of mushrooms, I was super excited to try a recipe I had clipped from Relish magazine a month or so prior…Caramelized Onion-Chanterelle Tart. Of course, when I first saw it, knowing that our little mushroomers had an abundance of them, I scanned it and sent it to Kyle, who made it the very same night and said it was delicious.  After our own foraging expedition, I could hardly wait to try it myself!

2013-11-13 001

Well, it was worth the wait.  Kyle was right, it was delicious. I mean, really delicious!  The combination of flavors is incredible…savory-sweet onions and earthy mushrooms, Dijon mustard and Gruyere cheese.

Of course, you can make this with any kind of mushroom. But how cool is it that we actually foraged the mushrooms we used???  Forest to table!!

Caramelized Onion & Chanterelle Mushroom Tart

INGREDIENTS

1 refrigerated pie crust
1 tablespoon Dijon country-style (course-grain) mustard
2 tablespoons butter, divided
2 medium onions, sliced lengthwise
Sprigs of fresh thyme
4 ounces chanterelle mushrooms (or your favorite mushroom) sliced lengthwise
2 large eggs
1 cup half-and-half
1 cup shredded Gruyere cheese
1/4 teaspoon sea salt
Freshly ground black pepper

DIRECTIONS
Preheat oven to 350°.

Roll out pie crust to fit in a 12-inch tart pan. Place in pan and press into the sides. Coat surface with mustard. Bake 10 minutes. Let cool.

To prepare filling, melt 1 tablespoon butter in a deep skillet over medium heat. Add onions and sauté 15 minutes. Add salt, pepper and thyme leaves. Scrape into a small bowl.
In the same skillet, melt remaining butter. Add mushrooms and cook 10 minutes. Remove from heat.

Combine eggs and half-and-half and beat until well blended.

Sprinkle about half the cheese on the bottom of tart shell. Spoon in onions. Pour in egg mixture. Place mushrooms all over the top, along with remaining cheese.

Bake 40 minutes, or until tart is golden brown and filling is set. Serve warm or at room temperature. Serves 12.

Butter-Roasted Tomato Sauce

2013-10-27 002

The November/Thanksgiving issue of Bon Appétit is my second favorite issue (first being July’s “Barbecue”).  But this November, it wasn’t a Thanksgiving recipe that caught my attention.  It was this tomato pasta sauce recipe.  The description read, “Roasting coaxes depth from canned tomatoes, instilling a long-cooked flavor. A generous amount of garlic and anchovies adds even more character.”  Hmmmm.  I was pretty skeptical when I read through the recipe…I thought it actually looked too easy (and didn’t have enough ingredients) for that to be true.  Plus, one of the few ingredients is anchovies (read on).  But I know that one of our favorite restaurants when we visit our son in Portland, Nostrana, makes a gnocchi with butter tomato sauce, so I decided to try it.

Just FYI, usually if a recipe calls for anchovies, I leave them out.  But I guess I’m getting a little braver in the trying-foods-you-always-thought-you-hated department in my old age so I decided to go for it.  And, I’ve reading a lot lately about anchovies adding “umami” (you know, “Umami /uːˈmɑːmi/, a savory taste, is one of the five basic tastes…together with sweet, sour, bitter and salty”).  And FYI again, did you know that Worcestershire sauce is made from anchovies?  And I happen to really like Worcestershire. Alright. I’ll add the anchovies.

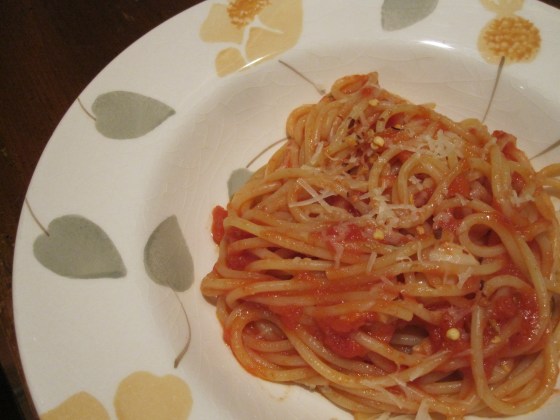
But back to the tomato sauce.  Once again, BA did not disappoint.  This is so unbelievably easy and delicious.  It takes almost no time to make and you’d think it had been simmering in a pot all day. Honestly the best tomato sauce I’ve ever had.  I don’t believe I’ll ever simmer again!  And, yes, I’ll be adding the anchovies.

Butter-Roasted Tomato Sauce

Bon Appétit, November 2013

INGREDIENTS

1 28-ounce can whole peeled tomatoes

8 garlic cloves, peeled, crushed

2 anchovy fillets packed in oil

1/4 cup (1/2 stick) unsalted butter, cut into small pieces

1/4 teaspoon crushed red pepper flakes plus more for serving

Kosher salt, freshly ground pepper

12 ounces bucatini or spaghetti

Finely grated Parmesan (for serving)

DIRECTIONS

Preheat oven to 425°F. Combine tomatoes (crushing them with your hands), garlic, anchovies, butter, and 1/2 teaspoon red pepper flakes in a 13×9″ baking dish; season with salt and black pepper.

Roast, tossing halfway through, until garlic is very soft and mixture is very thick, 35–40 minutes. Using a potato masher or fork, mash to break up garlic and tomatoes. (I mixed it a little bit with my hand blender.)

Meanwhile, cook pasta in a large pot of boiling salted water, stirring occasionally, until al dente. Drain, reserving 1/2 cup pasta cooking liquid.

Return pasta to pot and add tomato sauce and pasta cooking liquid. Cook over medium-high heat, tossing until sauce coats pasta, about 3 minutes. Serve topped with Parmesan and more red pepper flakes.

DO AHEAD: Tomato sauce can be made 4 days ahead. Let cool; cover and chill. Reheat before mixing with pasta.

Crispy Fried (Leftover) Turkey Tacos

2013-11-26 003

One of the best things about hosting Thanksgiving at your own house is leftovers…leftover turkey especially. The last several years, Tony and I have gone to Sonoma to celebrate the holiday with our daughter-in-law’s family (see last year’s post here), which is so much fun and so much delicious food, but no leftovers!  This year, plans got all discombobulated and we are ending up staying in town with Tony’s family, which is great, but still no leftover turkey.

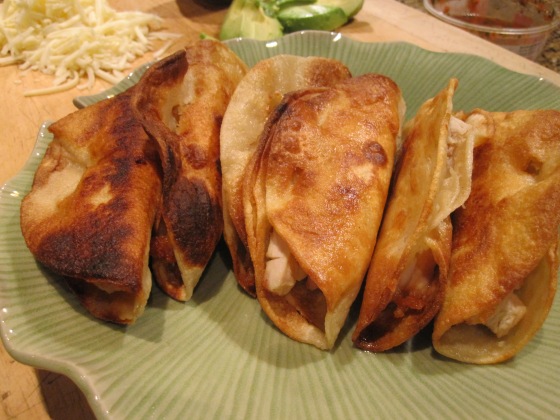
So last weekend we decided to roast a turkey breast, just for the two of us, so we could have leftovers.  Of course, we’ve done the mandatory BLAT sandwich, but still had more.  I recalled years ago going to Tony’s Jacal, a Mexican restaurant in Solana Beach that’s been around since 1946, where I had a turkey taco.  A deep-fried, crispy turkey taco.  It’s like their “signature” dish.  And it was one of the best things I’ve ever had.  (Which actually begs the question, “why haven’t I made them before now?”  Well, I guess because we usually only make a turkey for Thanksgiving, which, in and of itself, is dumb.  Every year, after T’giving, Tony says, “we should really make turkey more often.” And I agree.  And we never do.)

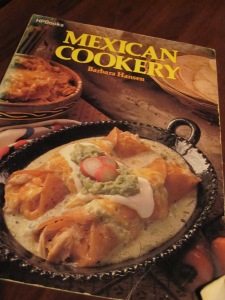
Okay, again I digress.  I had a general idea of how to do this (I mean, I can’t remember the last time I deep fried a taco…we’re all about soft tacos, right?) but decided I’d pull out the (very) old, tried-and-true HPBooks Mexican Cookery cookbook I’ve had for years and years and sure enough, instructions for “how to make & fill taco shells…you can fry tacos after they are filled.”  Bingo!

2013-11-26 006

HPBooks Mexican Cookery, circa 1980. And those chicken enchiladas verde on the cover are muy delicioso!

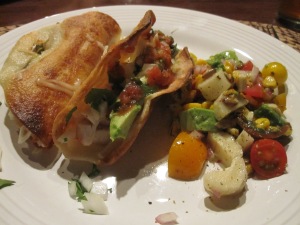
I couldn’t remember what toppings Tony’s Jacal served with their turkey tacos, but we decided on shredded jack cheese, avocado, white onion, cilantro and salsa.  They were muy bueno.  I mean, really really muy bueno.  Not sure what it is about the combination of turkey and deep frying the tortillas, but it is wonderful.  Really worth it.  No soft tortillas here!

I promise now I will be roasting a turkey more often, if only just to have leftovers for these tacos.  (I’m actually hoping I’ll be able to pilfer some of the leftovers from my in-laws on Thursday so I can make these again!!!)

And the tacos were delicious accompanied by one of our favorites, Pati’s Chop-Chop Salad.

2013-11-26 004

Crispy Fried (Leftover) Turkey Tacos

INGREDIENTS

Corn tortillas (you’ll probably want 2 or 3 per person)

Cooked turkey, shredded or cut into small pieces (you’ll need about 1/4 cup per taco)

Vegetable oil for frying

Your favorite accoutrements – we used shredded jack cheese, avocado, white onion, cilantro (I like to chop the white onion and finely chop the cilantro and mix them together in a small bowl for serving) and salsa.

DIRECTIONS

Heat each tortilla on a griddle until softened.  Place about 1/4 cup turkey on each warmed tortilla and fold in half.  Fasten securely with wooden picks.

Heat oil in a large skillet to 365° (don’t have a thermometer?  The easiest, and safest, method is to stick the end of a wooden spoon into the oil. If you see bubbles form around the wood and they start to float up, your oil is hot enough to cook with).

Fry a few tacos at a time in hot oil until they are crisp, turning as necessary.  Drain tacos on paper towels.  Before serving, remove the wooden picks and add your favorite accoutrements.

Parmesan Chicken with Caesar Roasted Romaine

2013-09-24 004

A while back, Bon Appétit posted an article called, “27 Recipes for Boneless, Skinless Chicken Breasts That Are NOT Boring“.

The description said, “chicken breasts may be everyone’s go-to lean protein—but, man, can it be BORING. Too often it’s an overcooked afterthought, sautéed and tossed into pasta or tumbled over some greens. Nobody likes dry, flavorless chicken, even if it is healthier than, say, luscious, drool-inducing pork belly.

But we say: No more! WE WILL NOT PUT UP WITH BORING BREASTS! That’s why we’re presenting 27 of our best, most enthralling chicken-breast recipes—from a hearty Moroccan stew to a rich roulade to a light chicken salad—each of which will take your healthy chicken routine from drab to fab.”

Okay.  I’m curious. So I scrolled through the slide show and found a bunch that looked good (including Chicken w/Herb-Roasted Tomatoes & Pan Sauce, Chicken Breast Dijon, Chicken w/Salsa Verde and Chicken, Asparagus & Wild Mushroom Stir Fry), but the one that really tempted me was the very first photo…Parmesan Chicken with Caesar Roasted Romaine, so I printed out the recipe and added it to the ever-expanding recipes-I-must-try pile.

Then a few weeks later, we’re having the “what shall we have for dinner?” conversation and I remembered the chicken.  Pulled out the recipe.  AND had all the ingredients on hand.  Perfect.

Not only was it super duper easy, but it was really delicious too.  I honestly couldn’t believe how moist the chicken stayed.  And I loved the roasted romaine.

The only thing I changed was that I had some homemade Caesar salad dressing in the fridge, so I used that for drizzling on the romaine before roasting and drizzled a little more on just before serving.

Parmesan Chicken with Caesar Roasted Romaine

INGREDIENTS

4 7-ounce skinless, boneless chicken breasts

Kosher salt, freshly ground pepper

1/2 cup grated Parmesan, Pecorino, or Asiago cheese (about 1 1/2 ounces)

1/2 cup panko (Japanese breadcrumbs)

3 tablespoons extra-virgin olive oil, divided

2 tablespoons chopped flat-leaf parsley

2 garlic cloves, chopped, divided

2 large hearts of romaine, halved lengthwise

4 anchovy fillets packed in oil, drained, chopped (optional)

1 lemon, cut into 8 wedges

Ingredient info: Panko is available in the Asian foods section of most supermarkets and at Asian markets.

DIRECTIONS

Preheat oven to 450°F. Line a large rimmed baking sheet with foil. Season chicken with salt and pepper; place on prepared sheet. Combine cheese, panko, 2 tablespoons oil, parsley, and 1 garlic clove in a medium bowl; season with salt and pepper. Pat panko mixture onto breasts. Roast chicken until crumbs begin to turn golden, about 10 minutes.

Drizzle romaine with 1 tablespoon oil and sprinkle with remaining 1 chopped garlic clove. Season with salt and pepper. Remove sheet from oven; place romaine roast right around chicken. Roast until chicken is cooked through and lettuce is browned at edges, about 5 minutes. Divide among plates. Top lettuce with anchovies (if using); garnish with lemon wedges for squeezing over.

Kale and Quinoa Salad

2013-09-30 003

So, a year ago I would have told you that I don’t like kale. In fact, I probably would have pouted, stomped my foot and said, “I don’t like kale.” Then I had a Kale & Brussels Sprouts Salad that converted me. A month ago, I would have told you that I don’t like quinoa. Then I had a Quinoa and Kale (whaaaat?) salad at Great Maple and it forever changed my mind about quinoa.

What is quinoa anyway? It’s not a grain. It’s some weird seed-type thing. We were told last year at the Urban Solace Passover Seder that it’s okay to eat on Passover because it’s not a grain. I had to look it up on Wikipedia. Also learned from Wiki – 2013 is International Year of Quinoa. Seriously. “The objective is to draw the world’s attention to the role that quinoa plays in providing food security, nutrition and poverty eradication, in support of achieving Millennium Development Goals.” Go, Quinoa!

02-20-2013quinoa

Uncooked quinoa

Uncooked quinoa (Trader Joe’s Organic Tricolor Quinoa)

Okay, so back to the quinoa salad story… Great Maple is a new-ish restaurant in San Diego, housed in what used to be an old-school coffee shop. It’s funky and cool and the food & cocktails are really good. Tony and I went a couple of Friday’s ago. They do this cute thing every Friday at 6:30pm…they bring a glass of champagne to every patron and do a toast called “Cheers to Charlie”, basically saying thanks for a great week. Very cute. (Oh, and did I mention the cocktails? I had a Great Maple Honey Mule…honey vodka, mint, lime & ginger beer. Served in a really cute bear glass. Heaven.)

great maple mule

Sidetracked again.  The salad. Great Maple calls it Suzi’s Farm Kale Salad: fresh local kale, quinoa, Pecorino cheese, fresh tomato, red onion and shallot vinaigrette. It was delicious. So delicious, in fact, that I couldn’t stop thinking about it. So the Sunday after we ate there, I created a similar recipe. And we’ve had it twice three times since. Might be my new favorite salad.

Kale and Quinoa Salad (sorta like Great Maple’s)

INGREDIENTS

Dressing:

(adapted from Lemon-Shallot Vinaigrette from Jan Birnbaum, Food & Wine)

1/2 teaspoon finely grated lemon zest

2 tablespoons fresh lemon juice

2 tablespoons minced shallot

1-1/2 teaspoons Dijon mustard

1-1/2 teaspoons white wine vinegar

1 small garlic clove, minced

1/2 cup extra virgin olive oil

salt and pepper to tasted

In a blender, combine the lemon zest and juice, shallots, mustard, vinegar and garlic and puree until smooth. With the machine on, slowly add the olive oil until emulsified. Pour into a bowl and season with salt & pepper.

Salad:

(adapted from Great Maple…via my memory)

2 cups cooked Quinoa (I used Trader Joe’s Organic Tricolor Quinoa)

2 cups chopped kale (cut thick center stem pieces out)

1 cup cherry tomatoes, halved

1/2 cup red onion, thinly sliced into rings and then halved

1/2 cup coarsely grated Percorino Romano cheese

1/4 cup pine nuts (the salad at GM may or may not have had pine nuts; I thought I remembered them, but I don’t see them listed on the description on their menu online)

Cook quinoa according to package directions. Fluff with a fork & set aside to cool to room temperature.

In a large bowl, add kale, tomatoes, and red onion. Gently toss.

When cooled, add quinoa, gently tossing with a fork to further fluff & separate the quinoa. Drizzle dressing over and toss gently. Add cheese and pine nuts. Gently toss again, adding more dressing if necessary.

Best if made a little ahead of time, chilling for at least half an hour.

Fried Egg Sandwich with Bacon and Blue Cheese [Egg Sandwich Lyonnaise]

2013-06-06 003

The first time I had a Salade Lyonnaise was at a birthday lunch for my sister-in-law Kelly at Café Chloe (a cute little French restaurant here in San Diego) and I was instantly in love.  The combination of bitter greens (typically frisée), lardons (crisp bacon pieces), croutons and a poached egg tossed in a warm vinaigrette…c’est bon.

Then our friend Christine (of “Blanquette de Veau” fame) served it at a dinner party at her home.  Again.  C’est bon.  So when I saw that Smitten Kitchen posted a recipe for a sandwich that was inspired by Salade Lyonnaise, I knew I had to make it.  She fries the egg, rather than poaching, and uses a little of the bacon grease to make the vinaigrette (oh my!) and adds crumbled blue cheese, all on a crusty ciabatta roll.  C’est très bon.  It’s a quick and easy and really delicious weeknight dinner.  Add a glass of white Burgundy, some pommes frites (aka shoestring French fries) and voilà…you’ve turned your kitchen into a little French bistro!

Fried Egg Sandwich with Bacon and Blue Cheese [Egg Sandwich Lyonnaise]

Makes 2 sandwiches

INGREDIENTS

2 ciabatta rolls

1 1/2 cups frisée (French curly endive), torn into-bite size pieces (I couldn’t find frisée either time I’ve made the sandwiches – I used a Spring mix once and arugula once…both were delicious)
1 bacon slice, preferably thick-cut (I actually used two slices!)
1 tablespoon minced shallot (from 1 small)
1 teaspoon Dijon mustard
4 teaspoons red wine vinegar
Salt and freshly ground black pepper
1/4 cup crumbled blue cheese

1 to 2 teaspoons unsalted butter, divided
2 large eggs
Salt and freshly ground black pepper

DIRECTIONS

Split your rolls and put them in to toast.

Place frisée in a medium bowl.

Cut bacon crosswise into 1/4-inch wide lardons. In a small heavy skillet, cook bacon over moderate heat, until pieces are crisp. With a slotted spoon, transfer bacon to paper towels, reserving bacon fat in pan. Add shallot to bacon fat and cook for one minute, stirring. Add red wine vinegar and let hiss and bubble for 20 to 30 seconds, then remove from heat and whisk in Dijon. Immediately pour hot dressing over frisée and toss with drained lardons, salt and pepper.

Remove rolls from toaster and divide bacon-frisée salad between each bottom bun. You’ll want to heap on more than seems feasible or needed, especially once you realize how tasty it is. Top each salad pile with half (2 tablespoons) of the blue cheese.

Reheat skillet over medium-high heat. Add the butter and swirl it to coat the pan. Crack one egg into the skillet, season with salt and pepper and reduce heat to medium. I like to cover the skillet with a small lid at this point, as it seems to help the egg cook faster and more evenly. In one minute, you should have a perfect sunny-side-up egg. However, I find that for this sandwich, to somewhat rein in the mess, it helps to then flip the egg for 20 to 30 seconds, until the yolk is still runny, but less likely to run right off your sandwich.

Remove the egg from the pan and place it on top of the bacon-frisée salad on the bun. Repeat with remaining egg and come on, what are you waiting for? Dig in.

Tomato-Glazed Mini Meatloaves

2013-09-08 002

I love meatloaf.  I mean, I really love meatloaf (and leftover meatloaf sammies?  Don’t event get me started!) Tony, on the other hand, not such a fan.  When I first broached the subject a couple of decades ago, his response was something like, “No way. Meatloaf?  Gross.  Why would anyone want to eat a loaf of meat?”  Okay.  I’ll admit, when you phrase it like that, it’s not so appealing.  My argument was, “but you like burgers…it’s basically the same thing, only bigger.”  Well, it was an argument I wasn’t going to win.

So I order meatloaf when we go out.  And often usually pretty much always, when Tony goes out of town, I either make myself a little mini meatloaf (from that old tried-and-true Betty Crocker cookbook) or I order “to go” the Frieda’s Meatloaf from our local favorite Trails restaurant.

But that’s not to say that I haven’t tried to convert him. I think in the 29 years that we’ve been married (plus the four we were dating before that), maybe three times I’ve convinced him to try a “loaf of meat”.  First time was pretty early on.  It was my favorite from aforementioned Betty Crocker cookbook.  No go.

So I took a few years off and then last year, there was a recipe in Bon Appétit for banh mi-inspired meatloaf sandwiches, with a hoisin glaze.  He actually liked that.  (It was a pretty complicated recipe and involved cooking bacon first and adding it to the meat mixture and, of course, we didn’t have it in “loaf” style, just sliced on sandwiches, topped with a really yummy slaw, but we’re getting closer!)

Then when I bought the Smitten Kitchen cookbook a few months ago, there was a recipe for Tomato-Glazed Meatloaves.  She writes that she is a “sucker for a good meatball…however, it had always been my belief that I had no such adoration for meatloaf” and then someone pointed out that meatloaf is like one giant meatball.  HA!  She says she came up with a great recipe, but that still couldn’t “get past the loglike meatloaf shape”, so makes these little “meatloaves masquerading as big meatballs.”  So I figure I’ll try them.  Tell Tony they’re just big meatballs.  HA!  And guess what?  It worked.  He liked them!

Now I’m happy that there are two “loaf of meat” recipes I can make.  This one is much easier and cooks a lot quicker (the cooking time is about a third of what it takes to do a full-sized loaf).  Annnnddd…you can have meatloaf sliders for lunch the next day!

Tony was away at a guys’ golf trip this past weekend…guess what I made?

Tomato-Glazed Mini Meatloaves

(adapted just slightly from Smitten Kitchen)

Makes 12 mini meatloaves – serves 6

INGREDIENTS

Glaze:

Glaze:

4 teaspoons vegetable oil

1/2 cup tomato paste

2 tablespoons cider vinegar

2 teaspoons honey (I would actually double this next time – I like a sweeter glaze)

2 teaspoons Worcestershire sauce

1 tablespoon Dijon mustard

1/4 teaspoon salt

Meatloaves:

2 slices sandwich bread (should be about 1 cup of crumbs.  Note – I actually “cheated” and used a cup of store bought panko crumbs)

1 garlic clove, minced

1 medium stalk celery, chopped

1 medium carrot, chopped

Olive oil, for cooking

2 pounds ground beef

1 tablespoon tomato paste

1 teaspoon paprika

1 teaspoon Dijon mustard

2 tablespoons Worcestershire sauce

1/2 cup milk

1/4 cup finely chopped fresh flat-leaf parsley

2 large eggs

Optional – 8 ounces mushrooms, doubled or quartered, to toss in the baking dish and bake alongside the mini loaves

DIRECTIONS

Combine glaze ingredients in a small saucepan, and simmer, whisking constantly, for 2 minutes. Set aside.

Preheat your oven to 350°. Tear the bread into chunks and then blend it, in a food processor, into breadcrumbs (or use one cup store bought crumbs). Place breadcrumbs in a large bowl. Add the vegetables to processor and finely chop (or do it by hand).

Heat a large skillet over medium heat. Once the skillet is hot, coat the bottom with olive oil; add the finely chopped vegetables. Season with salt and pepper, and cook, stirring frequently, until they begin to brown, about 10 minutes.

Add the vegetables to the large bowl with breadcrumbs, then add the remaining ingredients. Stir together with a fork. With wet hands, form the mixture into twelve 3 inch meatballs.

Space the meatballs so that they are not touching, in a baking dish.  Brush each with a teaspoon or so of the tomato glaze. (If you’re adding mushrooms, here’s where you’d do it…just quarter or halve and scatter around the meatballs.) Bake for 20-25 minutes or until cooked through.

Serve on a bed of your favorite mashed potatoes.

Beer-Can Chicken

photo 4

So I think I’ve mentioned that the July “Grilling” issue of Bon Appétit is my favorite issue of the year (followed by a close second is the Thanksgiving issue).  This July’s has already produced infamous Sriracha-Glazed Chicken Skewers and the Beer-Can Chicken recipe had been taunting me for too long.  So I decided to make it one Saturday a couple weeks ago.  

Tony and I had been running around doing errands and stopped in at our local Sprouts Farmer’s Market to pick up the ingredients for dinner (the chicken and our fave Broccoli Slaw).  Sprouts is a chain of smallish grocery stores that specialize in organic, natural and healthy products.  Which is great – we bought a Rosie Brand “sustainably farmed, free range, organic, hormone and antibiotic-free” chicken, but the recipe calls for a can of light lager beer and Sprouts had a great selection of expensive bottled craft beers, but the only beer in cans they had was 12-packs of Pabst Blue Ribbon. (Seriously?  PBR?  I know PBR has become quite the hipster beer lately with most trendy, cool bars serving it, but really? A 12-pack?  All I needed was one can!)

1/2 can PBR + 4-3-2-1 Spice Rub = 1 delicious chicken

1/2 can PBR + 4-3-2-1 Spice Rub = 1 delicious chicken

Okay, fine.  So we took our expensive sustainably farmed, organic, free range chicken and our 12-pack of PBR home.  And you know what?  This chicken is DE-licious.  Incredibly delicious. And so easy and simple.  It’s moist and tender.  The steam from the beer and the salt in the rub just lock in all the juices.  And the skin gets all browned and crisp.  In the famous words of Colonel Sanders, “it’s finger licking good”.  Literally.  We were pulling meat off the bones and licking our fingers.  Tony claimed it was the best chicken he had ever had anywhere.  I’m still torn between this and the Sriracha skewers, but we’ll definitely be making this again.  And again.

2013-09-14 001

Well, what can I say? It IS called Beer-Can Chicken!

And the PBR wasn’t so bad either.

Beer-Can Chicken

(Bon Appétit, July 2013)

 INGREDIENTS

1 can light lager beer

1 3 1/2- to 4-pound chicken (buy the best quality chicken you can find)

2 tablespoons 4-3-2-1 Spice Rub (recipe follows)

 Special equipment: A foil baking pan (for drip pan)

DIRECTIONS

Pour out (or drink) half of beer (guess which I opted for?  Lol.)  Tip:  if you use a can opener to remove the whole top of the beer can, it’ll maximize the boozy vapors that make it to the chicken

Prepare grill for high, indirect heat and fit with grill pan (for a charcoal grill, bank coals on 1 side of grill and put drip pan on empty side; for a gas grill, leave 1 burner turned off and place drip pan over unlit burner). Add water to pan to a depth of 1/2″.

Season chicken with 2 tablespoons 4-3-2-1 Spice Rub. Place cavity of chicken, legs pointing down, onto open can so that it supports chicken upright. Place can, with chicken, on grill over indirect heat (and above drip pan). Grill chicken, covered, until cooked through and an instant-read thermometer inserted into the thickest part of thigh registers 165°F, 45-60 minutes. (If using charcoal, you may need to add more to maintain heat.) Let chicken rest 10 minutes before carving. Serve with pan drippings.

4-3-2-1 Spice Rub

You can use this simple formula to sass up plenty of things that aren’t poultry, like pork, steak, or vegetables.

INGREDIENTS

4 tablespoons kosher salt

3 tablespoons brown sugar

2 tablespoons sweet paprika

1 tablespoon cayenne pepper

 DIRECTIONS

Combine all ingredients in a small bowl.  Makes enough spice rub for two whole chickens. Double or triple the recipe and use it all summer.  Keep the leftover in a tightly covered jar or container.

Chilled Tomato and Stone Fruit Soup (aka Gazpacho)

2013-08-07 01.30.02

Gazpacho. That Spanish, tomato-based, chilled vegetable soup. Sometimes there’s just nothing better than a nice gazpacho on a summer evening. Last month when we were in Sonoma for our son Kyle’s wedding, I had gazpacho twice. At two different restaurants. Lasalette and Glen Ellen Star. They were both delicious, but I gotta say, the one at Glen Ellen Star was the best. Probably the best I’ve ever had. And the presentation was absolutely beautiful…the prettiest red color, with a little purple heirloom basil flower floating in the bowl. OMG. Tony and I went there for lunch, the day after the wedding. I’m not sure if it was that we were still floating on clouds post-wedding, but it was one of the best lunches ever. Gazpacho. The “sheet music” salad with mixed lettuces, cucumber, avocado, tomato, tahini dressing. A wood-fired white pizza with guanciale and arugula and a wood-oven roasted chicken skewer with tzatziki. OMG.

So when we got back to San Diego, the tomato plants in our garden were going crazy. Still on a high from the wedding and post-wedding gazpacho, I decided that would be a very good use of all our tomatoes. I’ve made gazpacho before. Our daughter Ally loves this grilled vegetable one from Bon Appétit several years ago, but it’s a pain in the a** to make. Delicious, but a pain. I thought I remembered seeing a recipe in a recent BA that sounded interesting, with cherries and peaches, in addition to the tomatoes. Found it. They actually call it Chilled Tomato and Stone Fruit Soup (not sure why they don’t just call it gazpacho?).

I made it. It was delicous. And so easy (I opted for the frozen cherries). Refreshing with just a touch of spicy from a jalapeño and a touch of sweet from cherries and peach. And it was a beautiful color. I actually served it twice – Tony and I had it the first for a light dinner, with a Caesar salad, and then a couple days later, I brought what was left to a friend’s for gazpacho “shooter” hors d’oeuvres (and talk about a nice presentation…garnished with a fresh cherry skewer!) I think it was even better a couple days later!

IMG_20130810_183959_626

Sorry, Ally, this will be the new gazpacho in our house.

Chilled Tomato and Stone Fruit Soup (aka Gazpacho)

(Bon Appétit, August 2013)

INGREDIENTS

2 pounds tomatoes (about 4), quartered

1 large English hothouse cucumber, peeled, seeded, cut into pieces

1 large ripe peach, peeled, halved

1/2 jalapeño, seeded (or with seeds for a spicier soup), chopped

1/2 garlic clove

1 cup fresh (or frozen, thawed) cherries (about 8 ounces), pitted

2 tablespoons (or more) white balsamic or Sherry vinegar

1/4 cup extra-virgin olive oil plus more

1 1/2 teaspoon kosher salt plus more

Freshly ground black pepper

Flaky sea salt (such as Maldon)

DIRECTIONS

Pulse tomatoes in a blender until finely chopped and transfer to a large bowl.

Pulse cucumber, peach, jalapeño, garlic, and cherries in blender until finely chopped and add to bowl with tomatoes. Mix in vinegar, 1/4 cup oil, 1 1/2 teaspoon kosher salt, and 1 cup cold water; season with pepper. Cover and let sit at room temperature 1 hour (I did this and then stuck it in the freezer just to get it chilled…I mean, it’s gazpacho, it needs to be chilled!) or chill at least 12 hours.

Season soup with kosher salt, pepper, and more oil and vinegar, if desired. Serve soup drizzled with oil and seasoned with sea salt and pepper.

DO AHEAD: Soup can be made 2 days ahead. Cover and chill.