Chilaquiles

2013-04-30 001

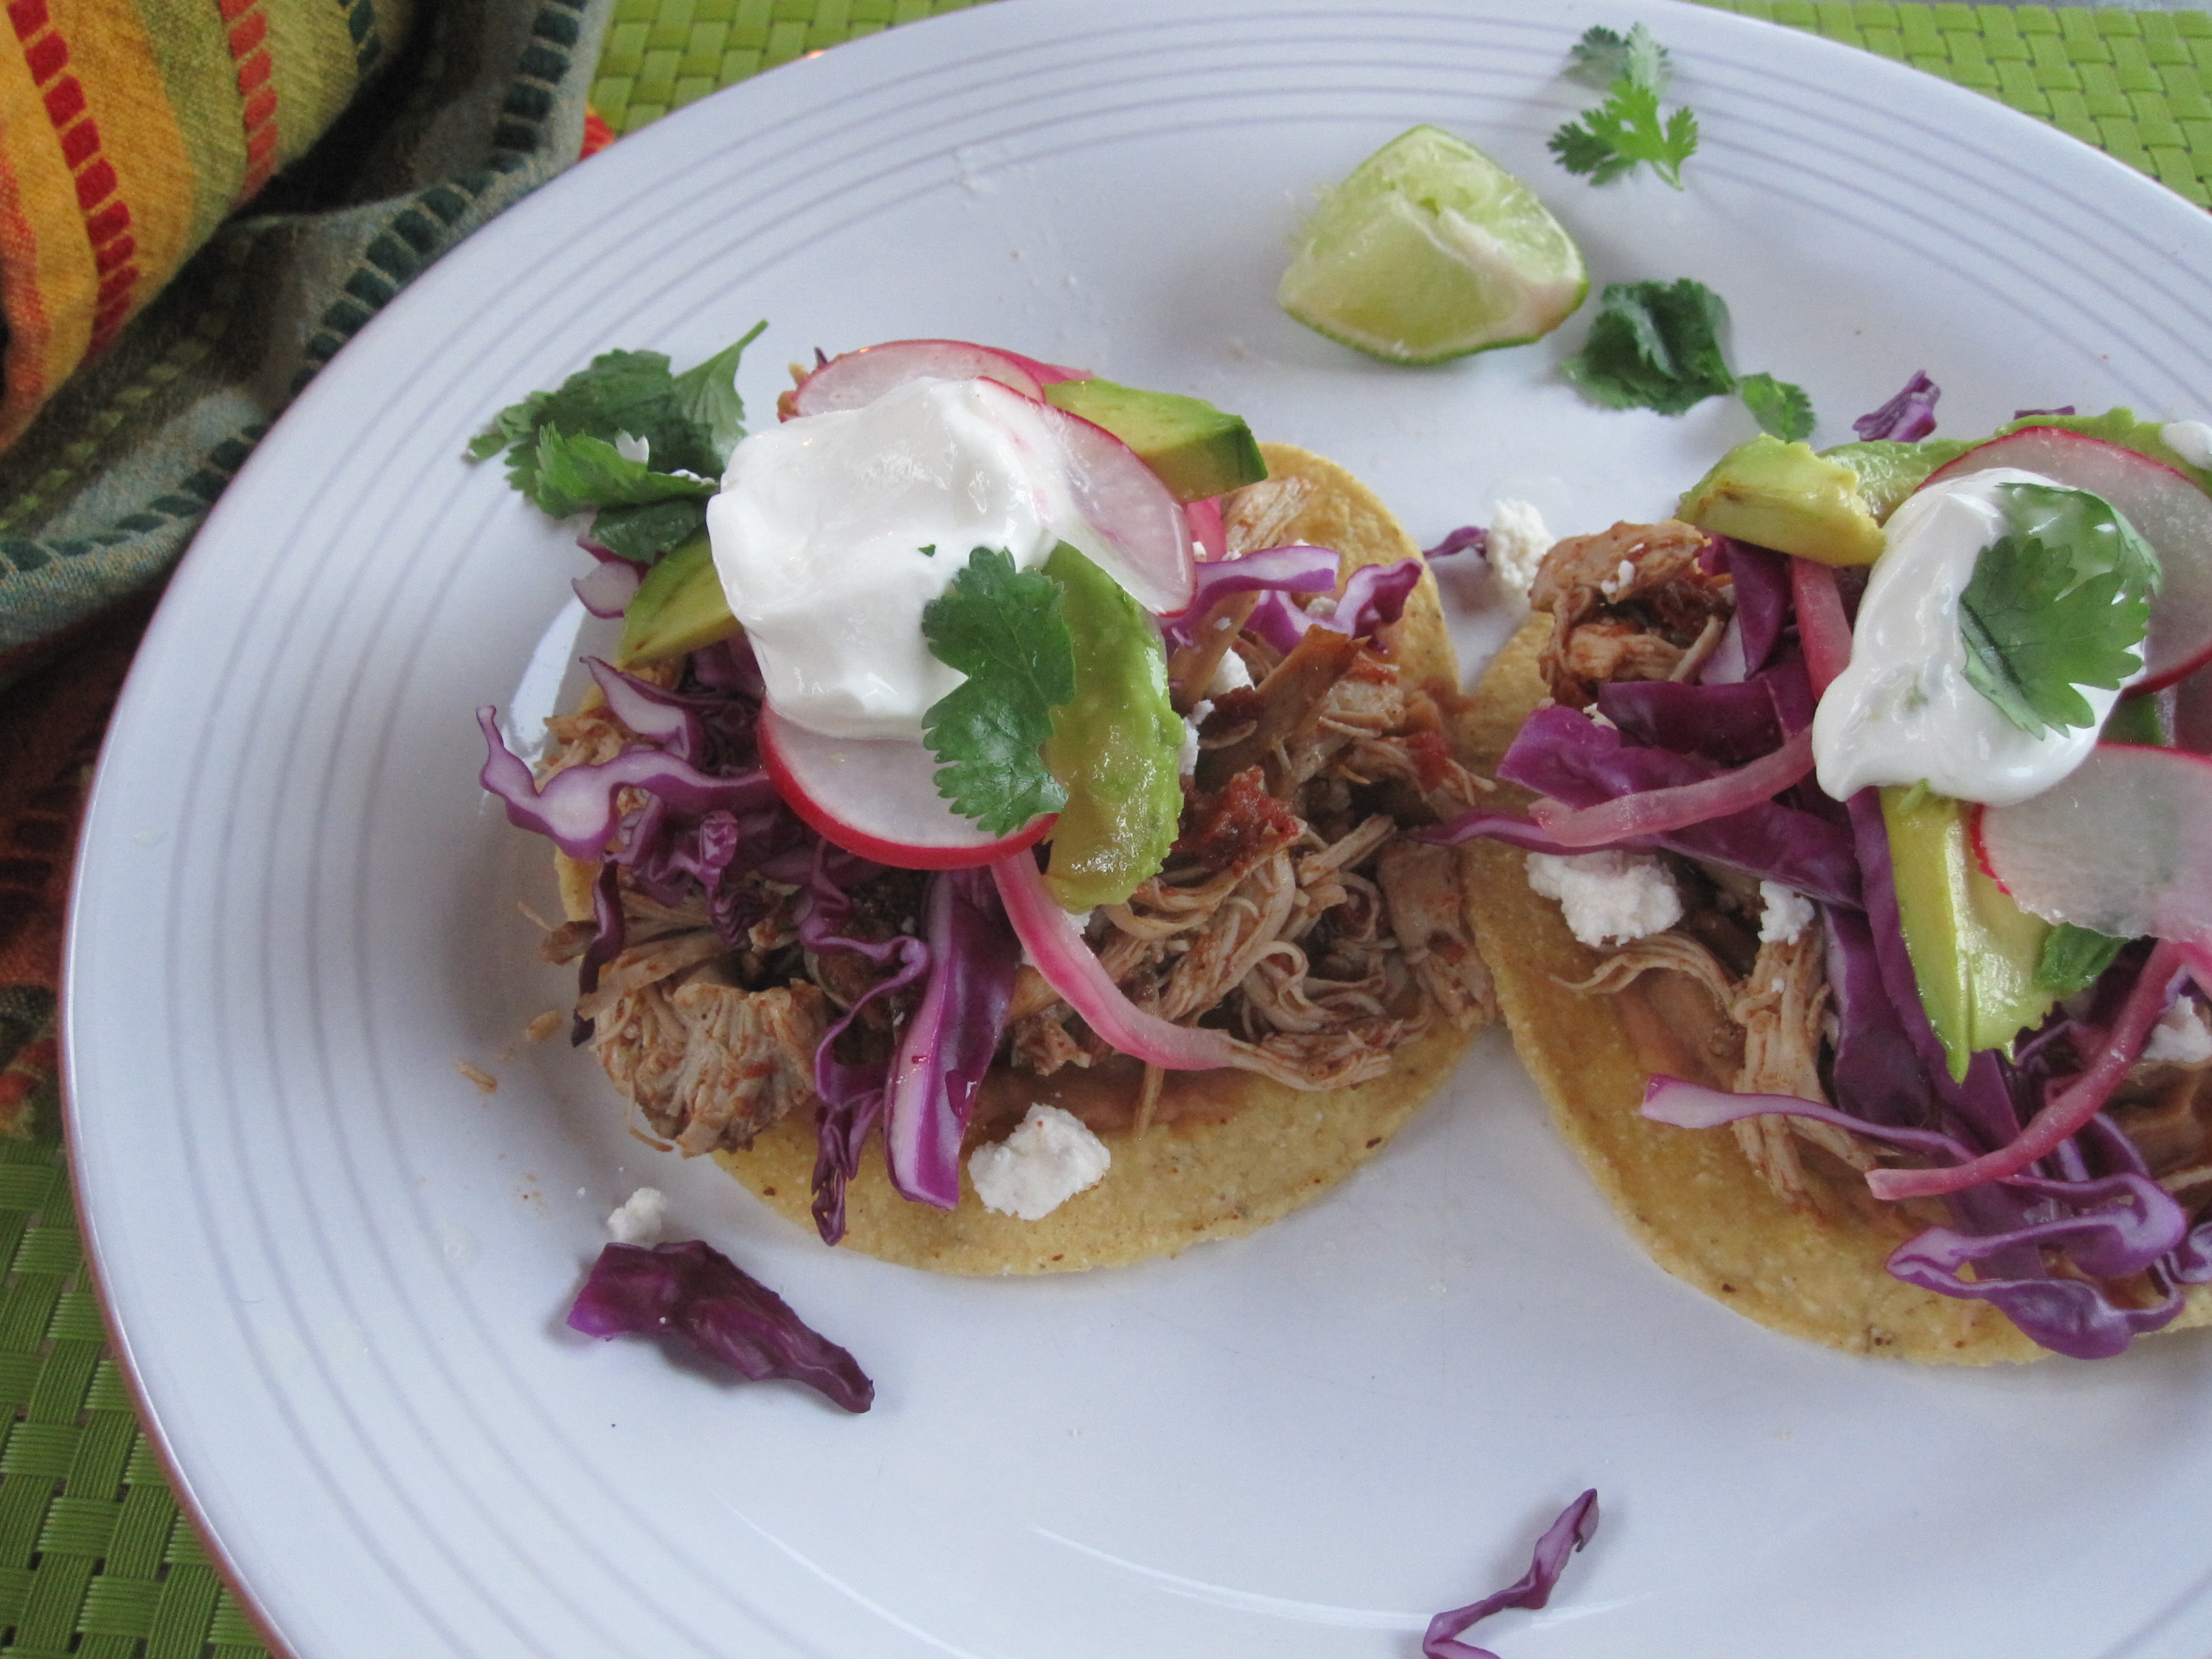
A couple of Saturdays ago we had dinner at our friends Chip and Dale’s (yes, you read that right).  Chip had cooked a couple of pork butts on his beloved Kamodo grill (and not a “Big Green Egg” kamado…Chip’s is the authentic kind, made in Mexico) and then shredded the meat for carnitas tacos.  Everything was muy delicioso, as it always is at Chip and Dale’s (stop snickering…those are their names) and, as usual, there was a ton of food and a ton of food left over, so Dale sent us home with our own little stash of shredded pork.

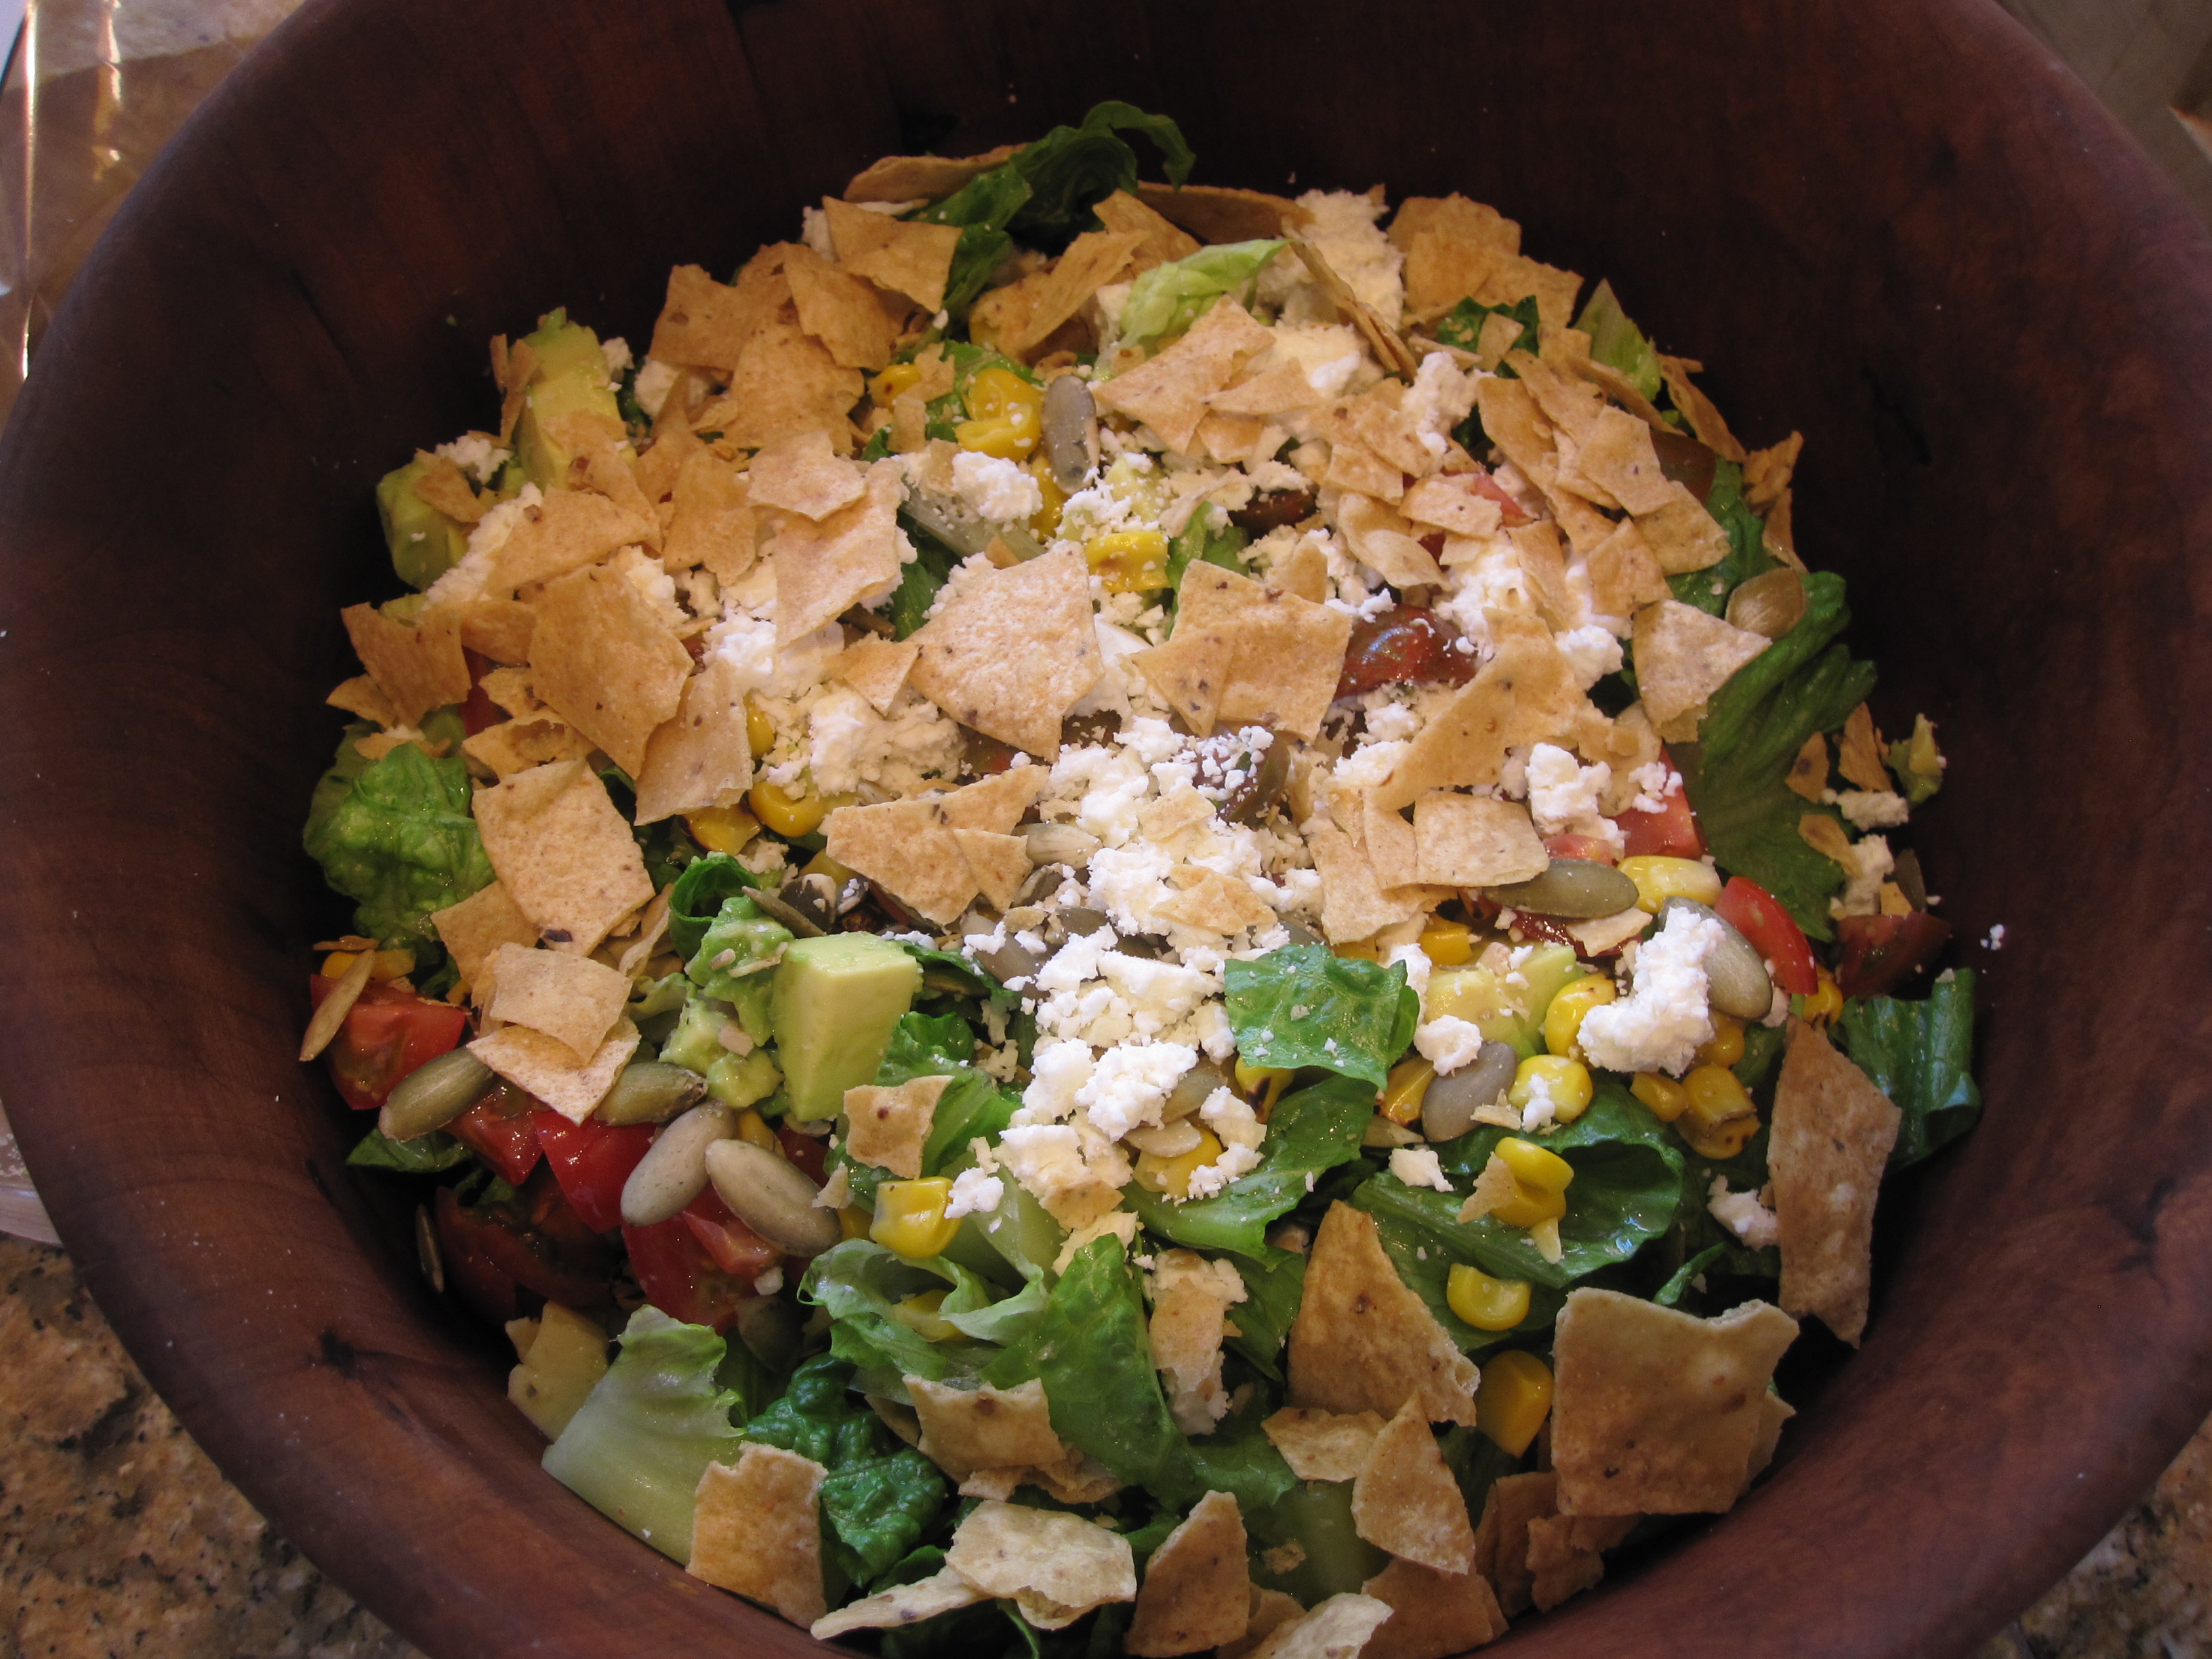
Come Monday, I’m driving home from work and thinking about how much I’m looking forward to making our own carnitas tacos for dinner.  Alas, I open the fridge to discover that someone (who shall remain nameless, but he’s the only other person who lives at this house) had been snacking on the leftover pulled pork.  Slight change of plans.  What shall we make?  And, at this point, I don’t feel like going to the grocery store, so what shall we make using what we have on hand?  Tortilla chips, eggs, cheese, salsa verde, a little sour cream…Chilaquiles!

Chilaquiles (pronounced chee-la-KEE-les) is a traditional Mexican dish, usually eaten for breakfast or brunch, that consists of fried tortilla strips simmered in a red or green salsa.  From there, you find many different variations, with additions such as fried or scrambled eggs, cheese, chiles, shredded chicken or pork, sour cream, onions and cilantro.

I found a recipe that looked interesting and easy at Redbook magazine online.  It’s a baked version and you basically just layer all the ingredients lasagna-style and then put it in the oven for ten minutes.  It was suggested as a way to use leftover Thanksgiving turkey.  It was really, really good (and really, really easy).  The guilty leftover-pork-snacking-person just kept saying, “yum” between bites.  We’ll be making this one again… I’ll have to remember it next November!

Note: just made these again.  I skipped the whole first step of simmering the salsa in oil.  No need.  Just put a generous tablespoon of oil in the ovenproof skillet before starting the layering.  

Chilaquiles

(adapted from redbookmag.com)

INGREDIENTS

2 cups green salsa

2 cups leftover cooked turkey (or chicken or pork), shredded

4-6 ounces lightly salted restaurant-style corn tortilla chips

1/2 cup sour cream

1 cup jalapeño (or regular) Jack cheese, shredded

2 eggs, fried over-easy or to your liking

1/4 cup crumbled Cotija cheese (optional)

2 tablespoons chopped fresh cilantro

DIRECTIONS

Heat oven to 425º.  In a small saucepan, heat 1 tablespoon canola oil over medium heat.  Add salsa and heat to simmering.

Spray a large, deep ovenproof skillet with cooking spray. Spread half of the salsa on bottom of skillet. Add half of the shredded meat, half of the chips, half of the sour cream, and half of the cheese. Repeat with the remaining salsa, meat, chips, sour cream, and cheese to make one more layer.

Bake for about 10 minutes, or until hot and cheese has melted.

While that’s baking, fry your eggs.

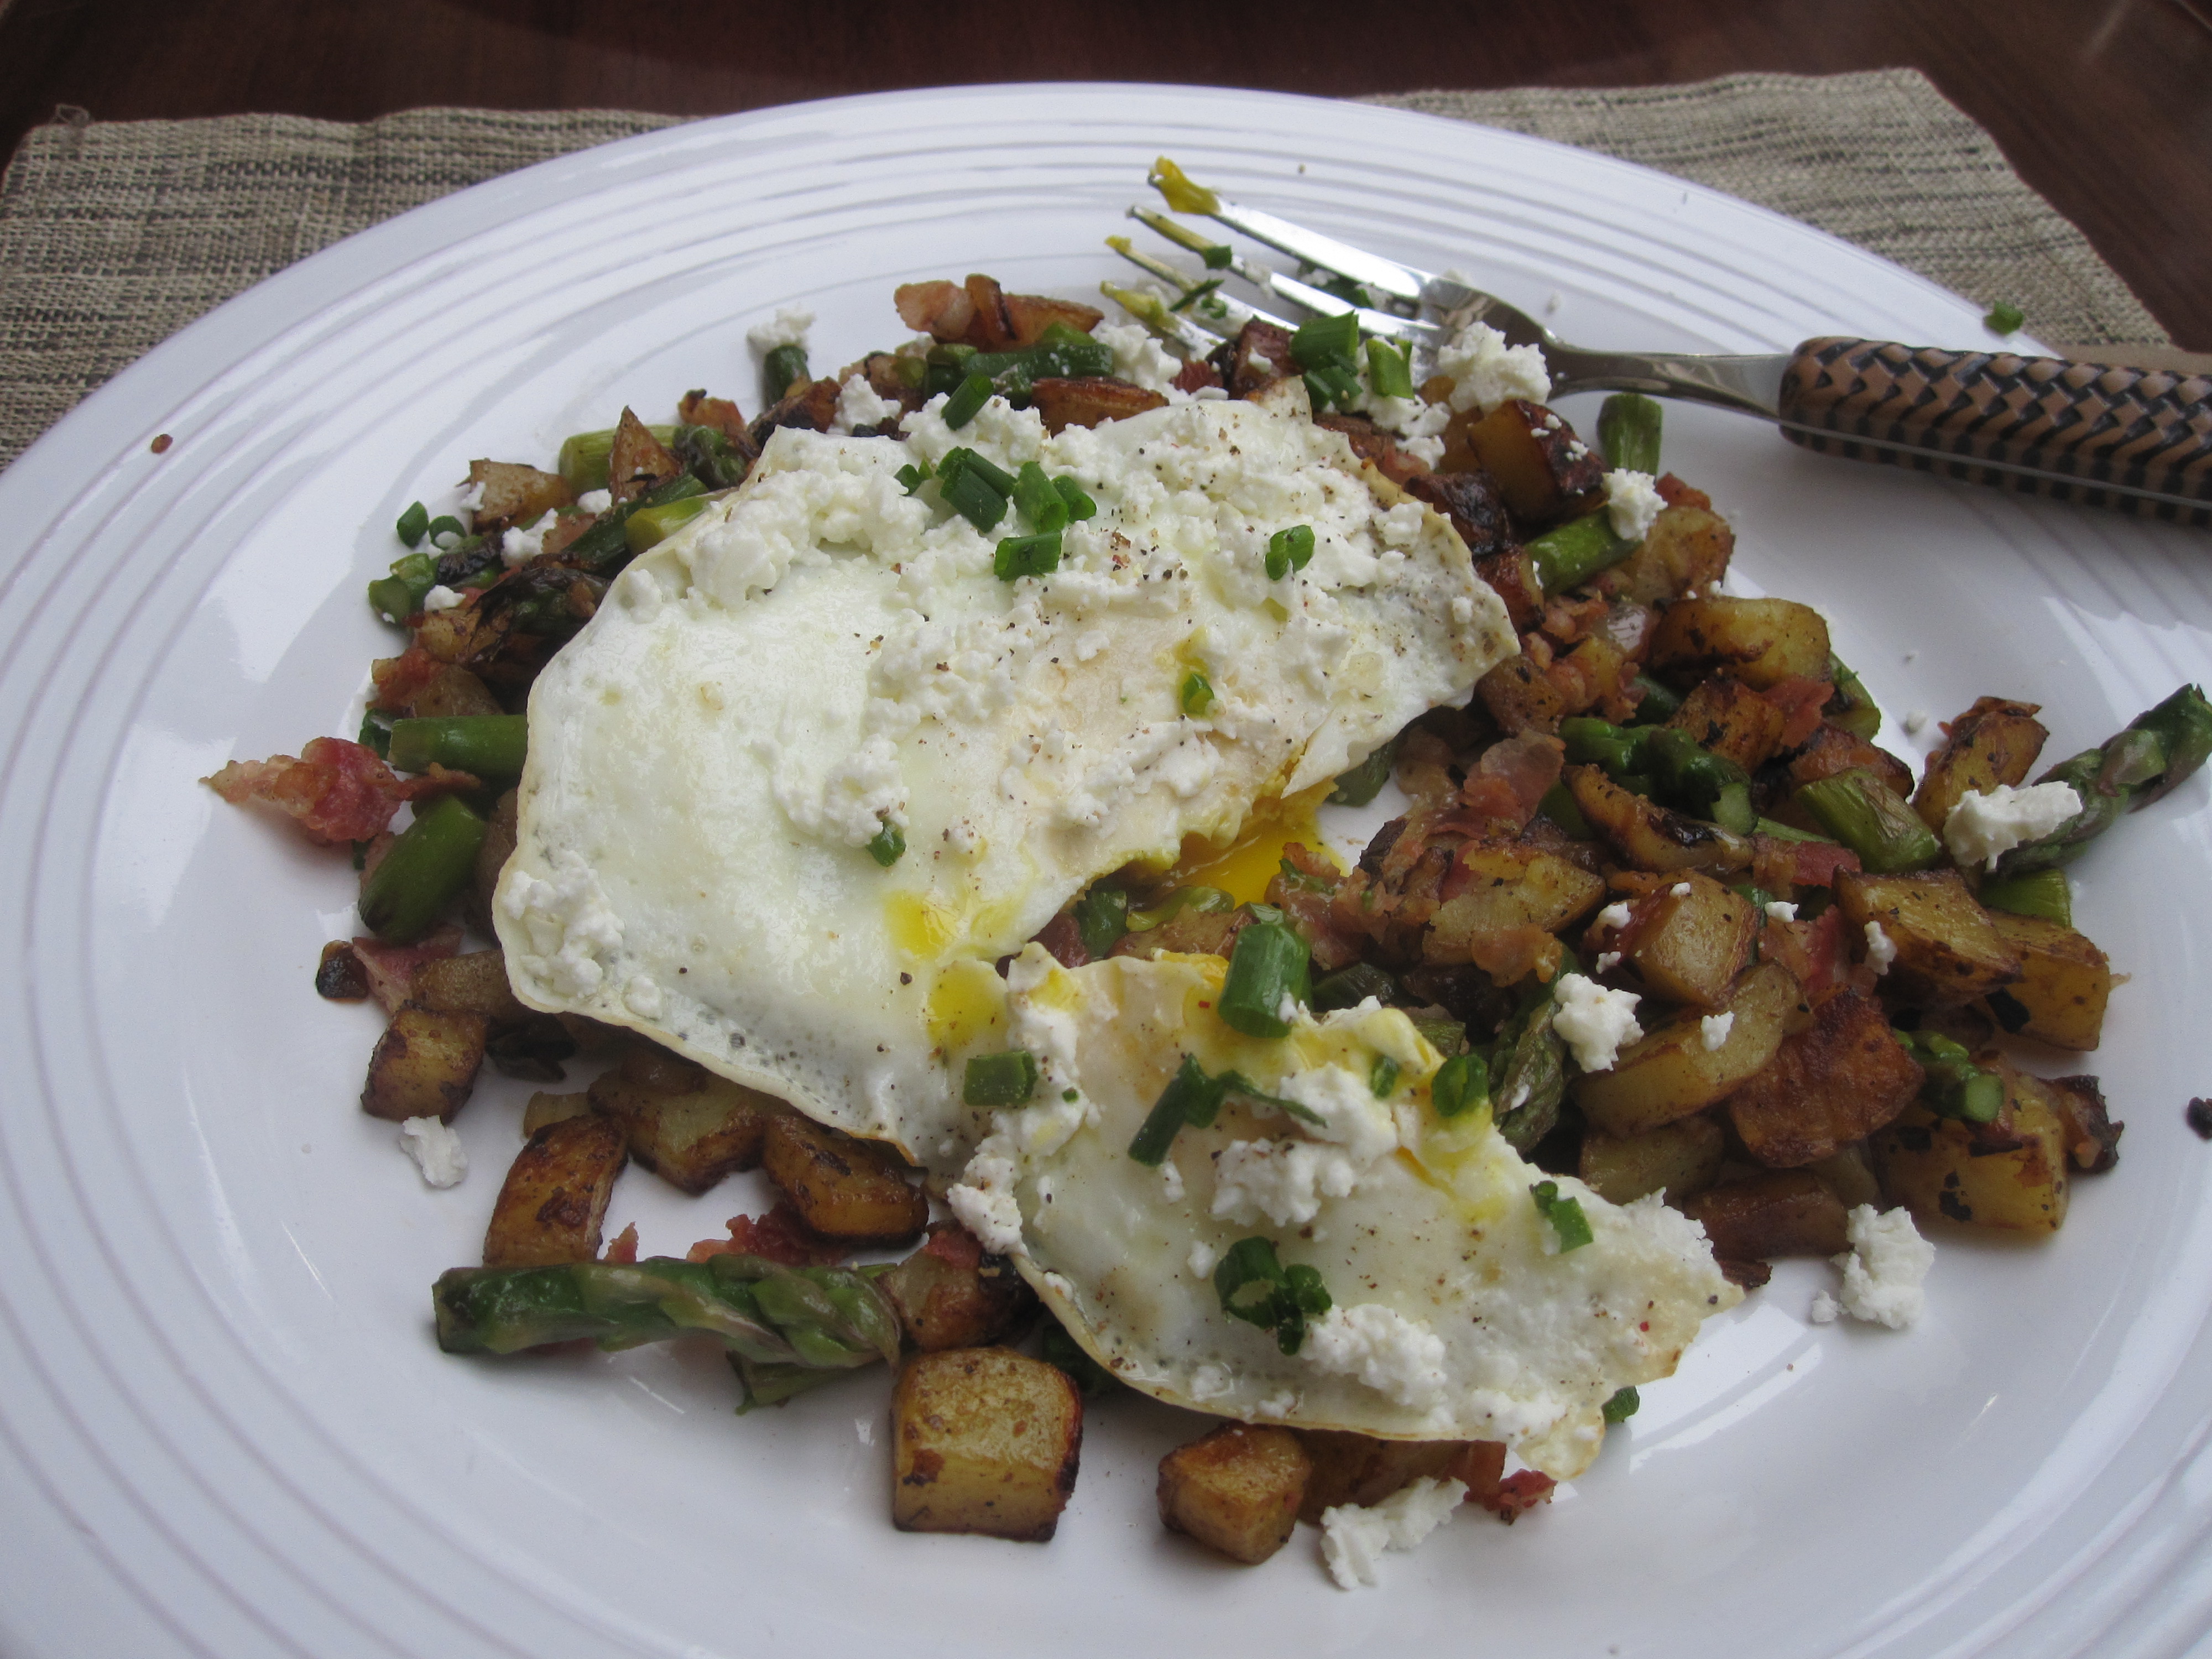
Remove chilaquiles from oven and spoon onto individual plates then top with fried egg, crumbled Cotija cheese (if using) and fresh cilantro.

Herbed Grilled Chicken Paillards

Paillards

Herbed Grilled Chicken Paillards.  “Qu’est-ce que c’est un paillard?” you ask.  Paillard (pronounced pie-yard) is the French term for a boneless chicken breast or other cut of meat that’s been pounded into broad, thin sheets about 1/4″ thick.

In my post about Tuscan Grilled Chicken, Sausage & Sage Skewers,  I refer to the now coverless Grilling issue of Fine Cooking and say that, in addition to the skewers, we like to make these paillards.  They are delicious, quick and easy and one of our all-time “go-to” recipes.  But one of the things we really like about making paillards is just saying, “paillard”.  And saying it in a very overly exaggerated French accent, with a very heavy emphasis on the “d”.  As in “pie-yar-D(uh).”

I think we’ve had these with just about every salad on the blog.  Just the other night it was the Kale & Brussels Sprouts Salad.  Grill a few extra paillards and you’ll have chicken for Fiesta Chicken Salad.

And let me know  if you become compelled to say “pie-yar-D(uh).”

Herbed Grilled Chicken Paillards

INGREDIENTS

4 boneless skinless chicken breast halves (6 to 8 ounces each), trimmed and rinsed
kosher salt and freshly ground black pepper
crushed red chile flakes
3 cloves garlic, minced
2 tablespoons chopped fresh rosemary, flat-leaf parsley, or other fresh herb
1/4 cup fresh lemon juice, plus 4 lemon wedges for serving
1/4 cup extra-virgin olive oil; more for drizzling

DIRECTIONS

Lightly wet a chicken breast with cold water and set it between two sheets of plastic wrap. Pound it into a broad, flat sheet about 1/4-inch thick (called a paillard), using a meat pounder, the side of a heavy cleaver, a rolling pin, or a skillet. Pound the other breasts into paillards the same way and arrange them on a baking sheet.

Generously season each paillard on both sides with salt and pepper and a pinch or two of chile flakes. Sprinkle both sides with the garlic and rosemary. Drizzle both sides with the lemon juice and olive oil and pat into the meat with your fingertips.

Refrigerate the paillards for 20 minutes while you prepare the grill.

Heat a gas grill to high or prepare a hot charcoal fire. Brush and oil the grill grate.

Arrange the paillards on the grill grate and grill until cooked and firm to the touch, 1 to 2 minutes per side. (use a long, wide spatula to move and turn the paillards.) Transfer the paillards to a platter or plates. Drizzle with olive oil and serve immediately with lemon wedges for squeezing.

Muchas recipes for Cinco de Mayo

So we already know that Cinco de Mayo is this Sunday (you’ve seen all the Corona beer displays in the grocery stores, right?). I posted the recipe for Cilantro Limoncello Margaritas this morning and that got me thinking…I’ve got quite a few Mexican-inspired recipes on here. (Hey, we live in San Diego, we eat lots of Mexican food!)

And because I like you all so much and I’m feeling a little extra generous today, I’ll put a few of them here, all in one place, to make it easy on you. You might just want to try uno or dos or tres. Have at it.

IMG_3274

Fiesta Chicken Salad w/Lime-Cilantro Vinaigrette

2013-04-04 001

Arnie’s Avocado Cilantro Hummus

2013-03-12 002

Avocado & Hearts of Palm Chop Chop Salad

IMG_4119

Chipotle Chicken Tostadas

margarita cookies

Margarita Cookies

IMG_5143

Croissant Bread Pudding with Mexican Chocolate and Almonds

Cilantro Limoncello Margarita

 2013-05-02 001

Yes, I’ll get to the recipe for that delicious, frosty, amazing looking margarita in a minute, but first, the history of how it came to be.

One of our very favorite places on earth to go is La Villa del Valle in the Baja Mexico Wine Country.  What?  Baja Wine Country?  Sí.  Yessiree.  The Guadalupe Valley, just a bit northeast of Ensenada (only about an hour and a half drive from San Diego.)

Tony read an article about La Villa del Valle (back then known as Las Brisas, but apparently that big resort in Acapulco didn’t want to share the name) in LA Times Magazine back in 2006.  I’m going to let you look for yourself (links below), but after that first visit, we were absolutely hooked.  The Villa is so gorgeous, luxurious and comfortable and well appointed.  Deluxe.  It’s described as “Mexitteranean”-inspired. And, honest, if someone were to drug me, blindfold me, put me in a helicopter and drop me there, I’d swear I was in Tuscany.  Vineyards, organic gardens, swimming pool, gorgeous local artwork…I could go on and on.

094

096

And Phil and Eileen Gregory, the proprietor/hosts are gracious and interesting and so hospitable and just fun to be around.

We’ve been probably ten times since the first visit in 2006.  Of course, there were a couple years recently that we were a little nervous to drive down there, and sadly didn’t visit, but have been back twice in the last year and a half.  It’s even more amazing than ever.  Phil has a full blown winery now and they’ve even added a gourmet restaurant on the property.

042

098

We were so happy to be back and they were thrilled to have us.  And we will return.  Soon.  And often.

The original LA Times Magazine article here.

Ville del Valle website here.

Okay, so now for the recipe.  In that original article, Phil and Eileen were hosting a beautiful “Mexitteranean” cocktail party and one of the recipes they shared was for this Cilantro Margarita.  It’s a frozen version of the cocktail and calls for limoncello instead of Sweet & Sour, a little cilantro and the glass is rimmed with salt & cayenne pepper.  And it carries quite a punch.  We’ve made dozens of blenders full over the years.

Make a batch for yourself.  It may just inspire you to pay Phil and Eileen a visit.  And when you do, tell them the Brusers sent you.

Cilantro Limoncello Margarita

(Adapted slightly from La Villa del Valle)

Serves 1

INGREDIENTS

1-1/2 teaspoons salt

1/8 teaspoon cayenne pepper, or to taste

2 tablespoons cilantro, chopped

2 ounces tequila

1-1/2 ounces limoncello

1/2 ounce water

Juice of 1 lime

1/2 ounce simple syrup (or agave syrup)

1 cup ice

DIRECTIONS

Mix the salt and cayenne in a shallow plate or dish.  Rub the lime around the rim of each glass and dip into the mixture.

Blend the rest of the ingredients in a blender until the ice is crushed.  Freeze for 30 minutes, or until slushy.

Pour into a glass.  Add a couple of whole sprigs of cilantro to garnish.  Serve. 

Lemon Bars

2013-04-08 005

Lemon tree, oh so pretty

And the lemon flower is sweet.

But the fruit of the poor lemon

Is impossible to eat.

Anybody remember that song?  I do.  And it’s one of those songs that once you’ve got it in your head, it’s stuck there for a long time.  It apparently has been recorded by artists from Peter, Paul and Mary to Bob Marley and the Wailers (and in the 70’s was used in a commercial for Lemon Pledge).  In 1965, Trini Lopez recorded the most successful version of the song.  Okay, so I’m dating myself, but I must be remembering the Trini Lopez version and I was about seven years old.

Anywaaaaay…I am about to prove those lyrics wrong with this recipe for Whole Lemon Bars from the Smitten Kitchen cookbook. Because, indeed, the fruit of the poor lemon is very possible (and even delicious) to eat!

Arnie's Meyers

Arnie’s Meyers

I love lemon bars.  Whenever I’m at some function where there are lots of cookies and brownies and such to choose from, I always pick lemon bars.  But, I’m ashamed to admit, I had never made them.  Until now.  I’ve mentioned our neighbor Arnie (of Arnie’s Avocado Cilantro Hummus fame) and his Meyer lemons.  Well, I had an abundance of them so I decided to look for a lemon bar recipe and turned to the wonderful Smitten Kitchen cookbook.  (Have you bought it yet?  You really should.  Not only are the recipes wonderful, but the photography is gorgeous.  Food porn gorgeous.)

Whole Lemon Bars.  Deb Perelman says the recipe is based on her mom’s recipe that won first prize in a regional cooking contest.  You slice the lemons, take out the seeds, then add the slices (peel and all) to sugar in a food processor.  AND the entire recipe can be made in just that one bowl of the food processor!

Note:  if you are using a Meyer lemon, decrease the amount of sugar.  They are much sweeter than regular lemons.  Deb says she prefers them with regular lemons because she likes the tartness.  Next batch I’ll try regular lemons. 

Whole Lemon Bars

(adapted slightly from Smitten Kitchen)

INGREDIENTS

1 cup all-purpose flour

1/3 cup sugar

1/4 teaspoon table salt

8 tablespoons unsalted butter, cut in to chunks, plus extra for greasing pan

1 small to medium sized lemon (I used one of Arnie’s Meyers)

1 1/3 cups sugar (I decreased to 1 cup)

8 tablespoons unsalted butter, cut into chunks

4 large eggs

2 tablespoons cornstarch

1/4 teaspoon salt

DIRECTIONS

Place a rack in the middle of the oven and preheat your oven to 350 degrees. Cut two 12-inch lengths of parchment paper, and trim each to fit the bottom of an 8 inch square baking pan. Press the first sheet in to the bottom of your pan in one direction, then use the second sheet to line the rest of the pan, running it perpendicular to the first sheet. Lightly butter the exposed parts of parchment.

Blend the flour, sugar, and salt together in the work bowl of a food processor. Add the butter and pulse until the mixture is powdery, but if firmly pinched, will hold the pinched shape. Turn the dough crumbs into the prepared baking pan and press the dough evenly across the bottom and about 1/2 inch up the sides. Prick the dough all over with a fork and bake for 20 minutes, or until lightly browned. Should any parts bubble up, gently prick them again with a fork. Leave the oven on.

Cut the lemon in half. If the white pith is more than a 1/4 of an inch thick, you’ll need to remove it and the skin from one half of the lemon so that the bars aren’t too tart. (If you’re using a Meyer lemon, the skin is thinner and you should be able to skip this step!)  To remove the skin, place half of the lemon cut side down on the cutting board and remove the skin and pith in downward slices, working your way around the lemon.

Cut your lemon halves in to thick rings and discard the seeds. Toss the lemon rounds–whole–into the food processor. Add the sugar, then run the machine until the lemon is thoroughly pureed, about 2 minutes.

Add the butter and again run the machine until the mixture is smooth, scraping down the sides of the work bowl as needed. Add the eggs, cornstarch, and salt and pulse the machine in short bursts until the mixture is evenly combined.

Pour the lemon mixture over the crust and bake it for 35 to 40 minutes, or until the filling is set. You can test this by bumping the pan a little; it should only jiggle slightly. The bars should also start to get slightly brown on top.

Let the pan cool completely. Gently cut around the outside of the outside of the parchment paper to make sure no sides have stuck, then gently use the parchment “sling” to transfer the bars from pan to cutting board. Sprinkle with powdered sugar.

Cut into 16 squares.  Devour.  And then sing the Lemon Tree song.

Avocado & Hearts of Palm Chop Chop Salad

2013-03-12 002

So I’ve mentioned Pati before (see Cashew Butter Balls). She has a cooking show called Pati’s Mexican Kitchen. I have to admit, I said I watch her show occasionally, but Tony actually discovered it. Not sure how or why. I was away for the weekend and when I came home, he said, “I found this cooking show I think you’ll really like. She has great recipes. I recorded it for you.” This particular episode featured this Avocado & Hearts of Palm Chopped Salad. The salad is delicious. We make it all the time. She has a lot of great recipes. But, in all honesty, I’m pretty sure it’s not the recipes that keep Tony watching. It’s Pati. She’s adorable and she has this even more adorable accent. She’s always talking about the beautiful “col-ours” of the food. Yep. He’s got the DVR set to record every single episode.

I really do love this salad. It’s easy, tasty and beautiful “col-ours”. The only change I make is instead of using whole pumpkin seeds (they’re not always easy to find) and toasting them, I just throw in a few pepitas. (What’s the difference between pumpkin seeds and pepitas? Pepitas are actually the kernel inside a whole pumpkin seed; so if you were to take the seeds out of your pumpkin at Halloween and shell them, inside you’d find a pepita.)

Avocado & Hearts of Palm Chop Chop Salad
Ensalada de Aguacate y Palmitos

INGREDIENTS

Salad:
3 ripe Hass avocados, seeded & pulp cut into large chunks
14-ounce can hearts of palm, or about 1 1/3 cups, drained, rinsed and thickly sliced
1 cup corn kernels, from 2 large freshly cooked ears of corn or thawed and cooked from frozen
1 tablespoon red onion, chopped

6 ounces cherry tomatoes, or about 1 cup, whole or halved according to your preference
3 tbsp pumpkin seeds, toasted (I substitute pepitas – see note above)

Vinaigrette dressing:
2 teaspoons apple cider vinegar
1 tablespoon lime juice
1/4 teaspoon dried oregano
1/4 teaspoon sea salt
1/4 teaspoon black pepper
1/2 teaspoon brown sugar
2 tablespoons olive oil
2 tablespoons safflower oil

DIRECTIONS

To make the vinaigrette, pour the vinegar and lime juice in a small bowl. Add the oregano, salt, sugar, and black pepper. Pour the oil in a slow stream, whisking with a whisk or fork to emulsify. The vinaigrette can be made a day ahead of time and refrigerated, just emulsify before using.

(If using pepitas, you can skip this step.) To toast the pumpkin seeds, place them in an already hot, small saute pan set over medium heat. Stir often, being careful that they don’t burn; until you start to hear popping sounds (similar to popcorn) and they being to acquire a nice tan, about 4 to 5 minutes. Remove from the heat, place in a bowl and set aside.

In a large bowl, gently mix the avocado chunks, hearts of palm, corn kernels, cherry tomatoes and red onion with the vinaigrette. Sprinkle with the toasted pumpkin seeds (or pepitas) and serve.

Arnie’s Avocado Cilantro Hummus

2013-04-04 001

We live in this incredible neighborhood.  We’ve been in the same house for over 24 years and many of our neighbors have been in the ‘hood for that long too.  We moved in on Kyle’s second birthday (he’s now 26) and I was pregnant with our daughter Ally.

We have a Fourth of July block party and a holiday progressive party where we go from one house to another for different courses.  Kyle tagged it the “holiday REgressive” because, well, in addition to really great food, there’s a lot of wine involved too and the final house (Arnie & Adrienne’s) always serves Glug (or Gløgg?), a very potent mulled wine.

You’ll often find a box of lemons or limes or grapefruits or zucchini with a sign that says, “free…take some” by the mailboxes.  We bring each other fish from fishing trips and herbs from our gardens, pickles and baked goods from our kitchens.

We take care of each other when there’s a surgery or a health issue or the loss of a loved one.  About a month ago, Arnie had knee surgery and then his wife Adrienne was out of town for a couple days, so we brought him all the fixings for a carnitas dinner.  I saw Arnie driving the other day (yay…he’s driving!).  He stopped me to thank me for the carnitas and said he really needed help getting tangelos and Meyer lemons from his trees.  So of course I sent Tony, who after climbing a ladder to help pick fruit, came home with two grocery bags full!!!

2013-04-13 001

Tangelos and Meyer lemons. Thanks Arnie!!

AND a little container of Arnie’s homemade Avocado Cilantro Hummus.  Wowee.  Pleasant (and very delicious) surprise.  OMG.  I couldn’t stop eating it.  He even included the recipe and told Tony, “tell Cheryl its from my blog.  Ha ha.”  (Everyone’s a comedian).

So here it is.  Arnie’s recipe.  (But I’m not sharing the Meyer lemons!)

Avocado Cilantro Hummus

INGREDIENTS

2 cups cooked chickpeas (or 1 15-ounce can, drained)

1 clove garlic, minced

Juice of 1 medium sized lemon (about 3 tablespoons)

1 tablespoon tahini**

2-3 tablespoons extra virgin olive oil

1 medium Haas avocado, cut in half, pit removed, and flesh scooped out

1  cup cilantro leaves (don’t skimp on the cilantro…I noticed that my batch was not nearly as green as Arnie’s.  When I asked him about it, he said, “did you really pack the cilantro?  Really pack it.  Don’t skimp.”)

Pinch of cayenne (optional – I did add it and a good sized pinch)

Sea salt and freshly ground pepper to taste

DIRECTIONS

Place the chickpeas, garlic, lemon juice, tahini and 2 tablespoons of olive oil in a food processor and puree until smooth, Add the avocado and cilantro, and puree until very creamy. Add more olive oil or a couple of tablespoons of water for thinner consistency, if desired).  I do like my hummus a little thinner, and ended up adding about two additional tablespoons olive oil and two tablespoons water.  My lemon was small, so I squeezed another half.)  Season to taste with salt & pepper. Chill the hummus before serving.

**Arnie says “don’t buy ready-made tahini.  Buy several ounces of sesame seeds and toast them in the oven at 350 degrees until just golden, not brown.  Add a little olive oil and puree in food processor.  Store in fridge for subsequent batches.”  Sorry Arnie.  I used store-bought.

Matzo Crack (aka Chocolate Caramel Matzo Toffee/Brittle/Crunch

2013-03-23 011

Caramel Matzoh Crunch. Caramel Chocolate Matzo. Chocolate Matzo Bark. Chocolate Matzo Brittle. Chocolate Matzo Crunch. David Lebovitz calls it Chocolate-Covered Caramelized Matzah Crunch. Martha calls it Toffee Chocolate Matzah (yes, even Martha has her own variation!) Smitten Kitchen calls it Chocolate Caramel Matzo Crack(ers). My friend Dale makes a real jacked up version, which she calls Matzo Roca and swears that the recipe is the same as Almond Roca. (And, yes, there are almost as many variations in the way to spell matzo as there are recipes!)

Whatever you call this Passover confection, most of the recipes involve the same basic ingredients – matzo, brown sugar, butter and chocolate. I use Smitten Kitchen’s recipe (which she says she adapted from “David Lebovitz who adapted it from Marcy Goldman who is the genius who first applied this to matzo”) and we just call it Matzo Crack because, well, uh it’s pretty addicting.

I made a couple of batches for Passover and the leftovers were in a huge Ziploc bag in the fridge and every single time I opened the fridge I’d take a piece (or two). It was becoming a problem. Thank goodness for the monthly work potluck! Needless to say, now all my coworkers are addicted. Everyone loved it. Many didn’t even realize there was matzo involved. And they begged me to put it on the blog. So here it is. It’s unbelievably easy. I’m tellin’ you, it’s so good, it doesn’t have to be just for Passover. In fact, SK says try it with saltine crackers. Oh boy. I’m in trouble.

Matzo Crack

INGREDIENTS

4 to 6 sheets matzo

1 cup (2 sticks, or 8 ounces) unsalted butter, cut into a few large pieces

1 cup packed light brown sugar

a big pinch sea salt

1/2 teaspoon pure vanilla extract

1-1/2 cups semi- or bittersweet chocolate chips

1 cup toasted chopped almonds, pecans, walnuts or nut of your choice (optional)

Extra sea salt for sprinkling (optional)

DIRECTIONS

Preheat the oven to 350°F.

Line an 11-by-17-inch baking sheet completely with foil, and then line the base of the foil with parchment paper, cut to fit.

Line the bottom of the baking sheet with matzo. You’ll need to break pieces to fit in extra spaces.

In a medium heavy-duty saucepan, melt the butter and brown sugar together, and stir it over medium heat until it begins to boil. Once it has begun boiling, let it bubble for three more minutes, stirring it well. It will thicken a bit as it cooks. Remove from the heat and add the salt and vanilla, and then quickly pour it over the matzo or crackers. You’ll want to spread it quickly, as it will begin to set as soon as it is poured.

Bake the caramel-covered crackers for approximately 15 minutes, watching carefully as it will bubble and the corners might darken too quickly and/or burn. You can reduce the heat if you see this happening.

Remove from oven and immediately cover with chocolate chips. Let stand five minutes, and then spread them evenly across the caramel. An offset spatula works great here. If you’re using them, sprinkle the chocolate with toasted chopped nuts and/or sea salt.

Once completely cool — I sometimes speed this process up in the fridge, impatient as should be expected in the face of caramel crack(ers) — break it into pieces and store it in a container or Ziploc in the fridge. It’ll keep for as long as you can avoid eating it all.

Tuscan Grilled Chicken, Sausage and Sage Skewers

Apparently the “Grilling” issue of Fine Cooking magazine caught my eye once while standing in the checkout line at the supermarket and enticed me enough to buy it. There must have been something really delicious on the cover, but I couldn’t tell you what that was because the cover has since been chewed off by one black lab puppy named Lulu.  Anyway, there are a couple of recipes in it that we make all the time.  This is one.  The other is Herbed Grilled Chicken Paillards (and we like that especially because we like saying “paillard” in an overly-exaggerated French accent, with a strong emphasis on the “D”).

One of the secrets to these yummy skewers is the garlic-rosemary infused olive oil that you marinate the chicken in.  You’ll want to make the oil and start marinating at least a couple of hours, or even a whole day, ahead.

These are delicious accompanied by either Apple/Pomegranate/Blue Cheese Salad, Kale and Brussels Sprouts Salad or the Urban Solace Watermelon/Cucumber/Tomato Salad.

Tuscan Grilled Chicken, Sausage and Sage Skewers

INGREDIENTS

Rosemary-Garlic Oil

3/4 cup cups extra-virgin olive oil
3 cloves garlic, smashed and peeled
2 sprigs fresh rosemary

Skewers

2-1/2 lbs. boneless, skinless chicken thighs (about 7 or 8)
1/2 cup plus 2 Tbs. Rosemary-Garlic Oil (recipe follows)
1 tsp. chopped fresh rosemary
Kosher salt and freshly ground black pepper
1-1/2 lb. Italian sausage links, cut into 2-inch pieces
24 large fresh sage leaves

6-12″ metal skewers OR wooden skewers (if using wooden skewers, soak them in water for half hour before using).

DIRECTIONS

Rosemary-Garlic Oil

Heat the olive oil and garlic in a small saucepan over medium heat, stirring occasionally, until the garlic starts to bubble steadily, 3 to 4 min. Add the rosemary, remove from the heat, and let cool to room temperature. Transfer to a clean glass jar or other storage container, cover, and refrigerate. Use within five days.

Skewers

Trim the chicken of excess fat and cut in half (the pieces should be roughly equal in size; if the thighs are large, cut them in thirds or quarters).

Up to a day ahead and at least a couple of hours before serving, toss the chicken in a medium bowl with 2 Tbs. of the oil, the rosemary, 1 tsp. kosher salt, and 1/2 tsp. pepper.

Heat a gas grill to medium or prepare a medium-hot charcoal fire. Divide the remaining 1/2 cup oil into two small bowls (one for grilling and one for serving).

Alternately thread three pieces of sausage, three pieces of chicken, and four sage leaves onto skewers.

Grill the skewers, covered, until one side is browned and has good grill marks, about 4 min. Brush with some of the rosemary-garlic oil, flip, and cook the other side until it, too, has good grill marks, about 4 min. Brush with more oil and flip again. Continue cooking, flipping, and brushing with oil until the sausage and chicken are both cooked through (check by slicing into a couple of the thicker pieces), about 10 min. more.

Let cool for a couple of minutes and then arrange on a platter, drizzling with the remaining oil.

Spring Asparagus Pancetta Hash

2013-03-19 004

One of my favorite things about Spring is that asparagus is in season.  I love asparagus.  I love roasted asparagus and grilled asparagus and Tony’s pickled asparagus.  I love Grilled Prosciutto-Wrapped Asparagus dipped in a Saffron Aioli.

I came across this recipe from Smitten Kitchen (I know…I know…it’s an obsession…but, damn, she’s GOOD) last year and just knew it was going to be delicious.  I mean, come on…asparagus, potatoes, onion, pancetta, all topped with a fried egg??!?!?  The first time I made it Tony said it was (and I’m quoting here) the best thing he had ever effing eaten.  I didn’t change one thing. Tony fried the eggs and we topped with a little crumbled goat cheese and finely chopped chives.  Spring has sprung!

Oh boy…this just in…the new Bon Appétit came today (and you all know how happy that makes me) and there are nine asparagus recipes! Asparagus salad with gruyere and herbs…potato salad with asparagus and olives…smoked salmon and asparagus toasts…asparagus and ricotta flatbread!  Oh my my.  Can’t hardly wait!

Spring Asparagus Pancetta Hash

INGREDIENTS

1/4 pound pancetta, cut into 1/4-inch dice
1 pound Yukon gold potatoes, peeled and cut into a 1/2-inch dice
1 small yellow onion, chopped small
1/2 pound asparagus, tough ends trimmed and cut into 1-inch segments
Salt and pepper to taste

Serving ideas: Fried eggs, dabs of goat cheese and slivers of green onions

DIRECTIONS

Heat a 12-inch cast iron frying pan over medium heat. Fry the pancetta, turning it frequently so that it browns and crisps on all sides; this takes about 10 minutes. Remove it with a slotted spoon and drain it on paper towels. Leave the heat on and the renderings in the pan. (With a well-seasoned cast iron, this should be all the fat you need to cook the remainder of the hash. If you’re not using a cast iron, you might need to add a tablespoon or so of oil.)

Add the potatoes and don’t move them for a couple minutes. Use this time to season them well with salt and pepper. Once they’ve gotten a little brown underneath, begin flipping and turning them, then letting them cook again for a few minutes. The idea is not to fight them off the frying pan, once they’ve gotten a little color, it’s easier to flip them and you’ve gotten closer to your goal of getting them evenly browned.

When the potatoes are about three-fourths as crisped and brown as you’d like them — this takes about 15 minutes — add the onion. Cook for an additional 5 minutes. Add the asparagus, cover the pan and cook for 5 to 8 minutes, or until crisply cooked. (Skinny asparagus will take just 5 minutes; thicker asparagus will take longer.) Remove the lid, return the pancetta to the pan for another minute, to reheat.

Taste for seasoning and adjust if needed. Fry yourself a couple eggs in another pan. Gently place an egg on top of each serving of hash.  Sprinkle with a little goat cheese and chopped chives or thinly sliced green onions.  Serve immediately.